Stellar主题全面的配置文档可参考源码作者:Xaoxuu
添加运行时间/访问量

打开 _config.stellar.yml 文件,找到 footer,content: 改成:
总访问 113701 次 | 本页访问 326 次
  <script type="text/javascript">
    document.addEventListener('DOMContentLoaded', function() {
      var runtime_span = document.getElementById('runtime_span');

      function show_runtime() {
        // 调用定时器
        setTimeout(show_runtime, 1000);

        var seconds = 1000;
        var minutes = seconds * 60;
        var hours = minutes * 60;
        var days = hours * 24;
        var years = days * 365;

        var today = new Date();
        var todayYear = today.getFullYear();
        var todayMonth = today.getMonth();
        var todayDate = today.getDate();
        var todayHour = today.getHours();
        var todayMinute = today.getMinutes();
        var todaySecond = today.getSeconds();

        var t1 = Date.UTC(2018, 9, 12, 0, 0, 0); // UTC时间,月份从0开始
        var t2 = Date.UTC(todayYear, todayMonth, todayDate, todayHour, todayMinute, todaySecond);
        var diff = t2 - t1;

        var diffYears = Math.floor(diff / years);
        var diffDays = Math.floor((diff / days) - diffYears * 365);
        var diffHours = Math.floor((diff - (diffYears * 365 + diffDays) * days) / hours);
        var diffMinutes = Math.floor((diff - (diffYears * 365 + diffDays) * days - diffHours * hours) / minutes);
        var diffSeconds = Math.floor((diff - (diffYears * 365 + diffDays) * days - diffHours * hours - diffMinutes * minutes) / seconds);

        // 更新显示时间的span元素内容
        runtime_span.innerHTML = "🦉营业:" + diffYears + " 年 " + diffDays + " 天 " + diffHours + " 小时 " + diffMinutes + " 分钟 " + diffSeconds + " 秒🦉";
      }

      show_runtime(); // 初次调用函数以启动定时器
    });
  </script>
  </center>
  ```
::
添加评论功能
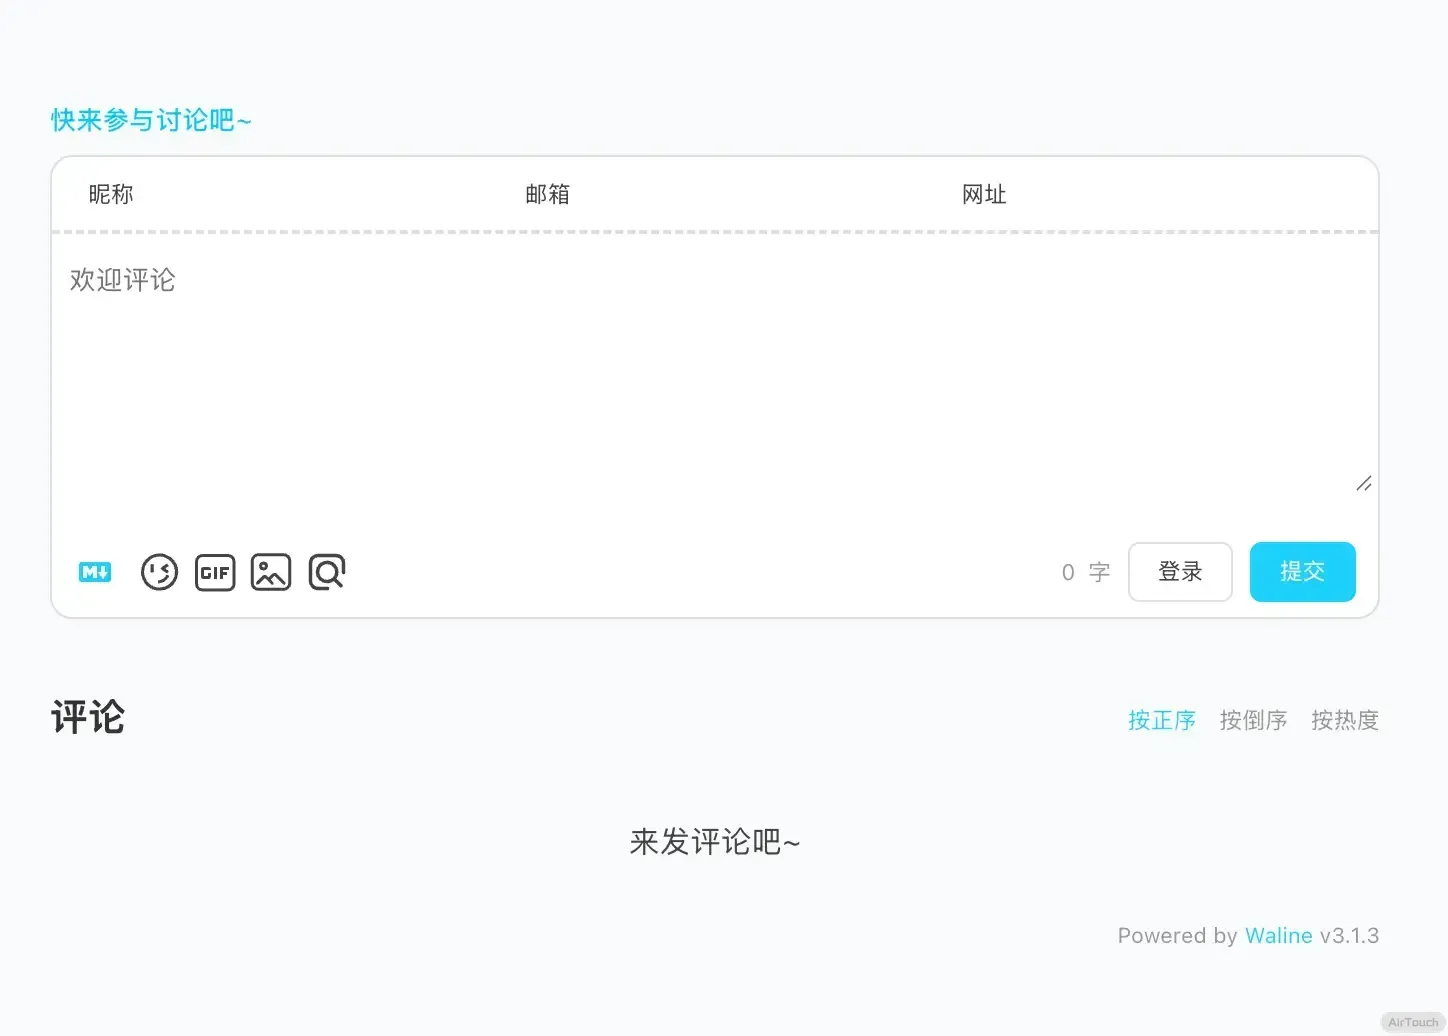
目前 Staller 主题集成多种评论功能插件,包括 beaudar、utterances、giscus、twikoo、waline、artalk。我用的是waline。
根据官方文档,我使用 vercel 进行的部署
数据库设置
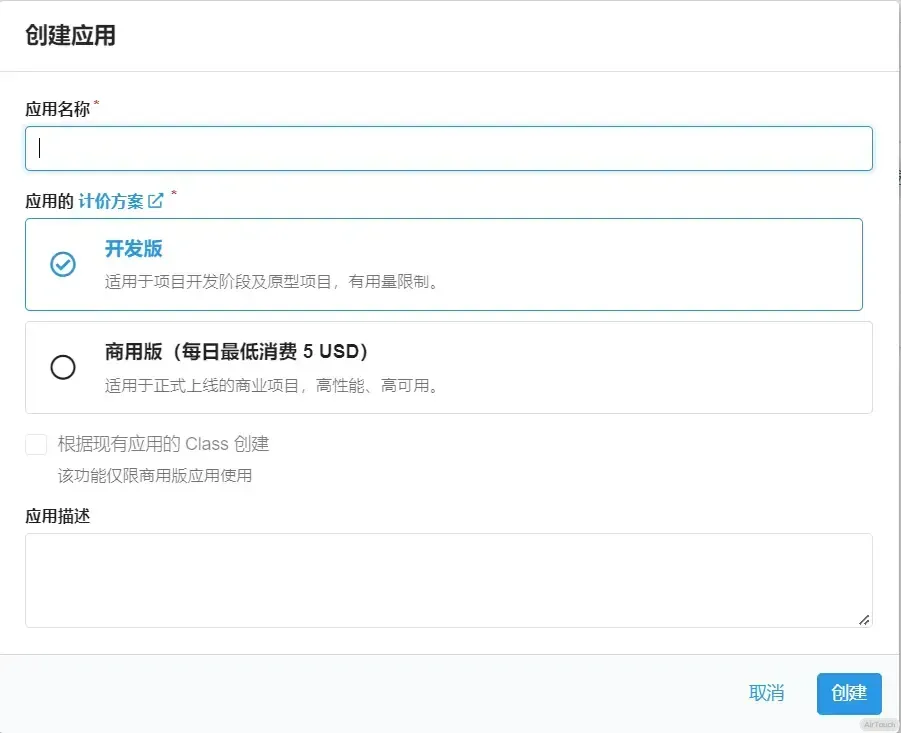
- 登录 或 注册
LeanCloud 国际版并进入 控制台 - 点击左上角 创建应用 并起一个你喜欢的名字 (请选择免费的开发版):
- 进入应用,选择左下角的
设置>应用 Key。你可以看到你的APP ID,APP Key和Master Key。请记录它们,以便后续使用。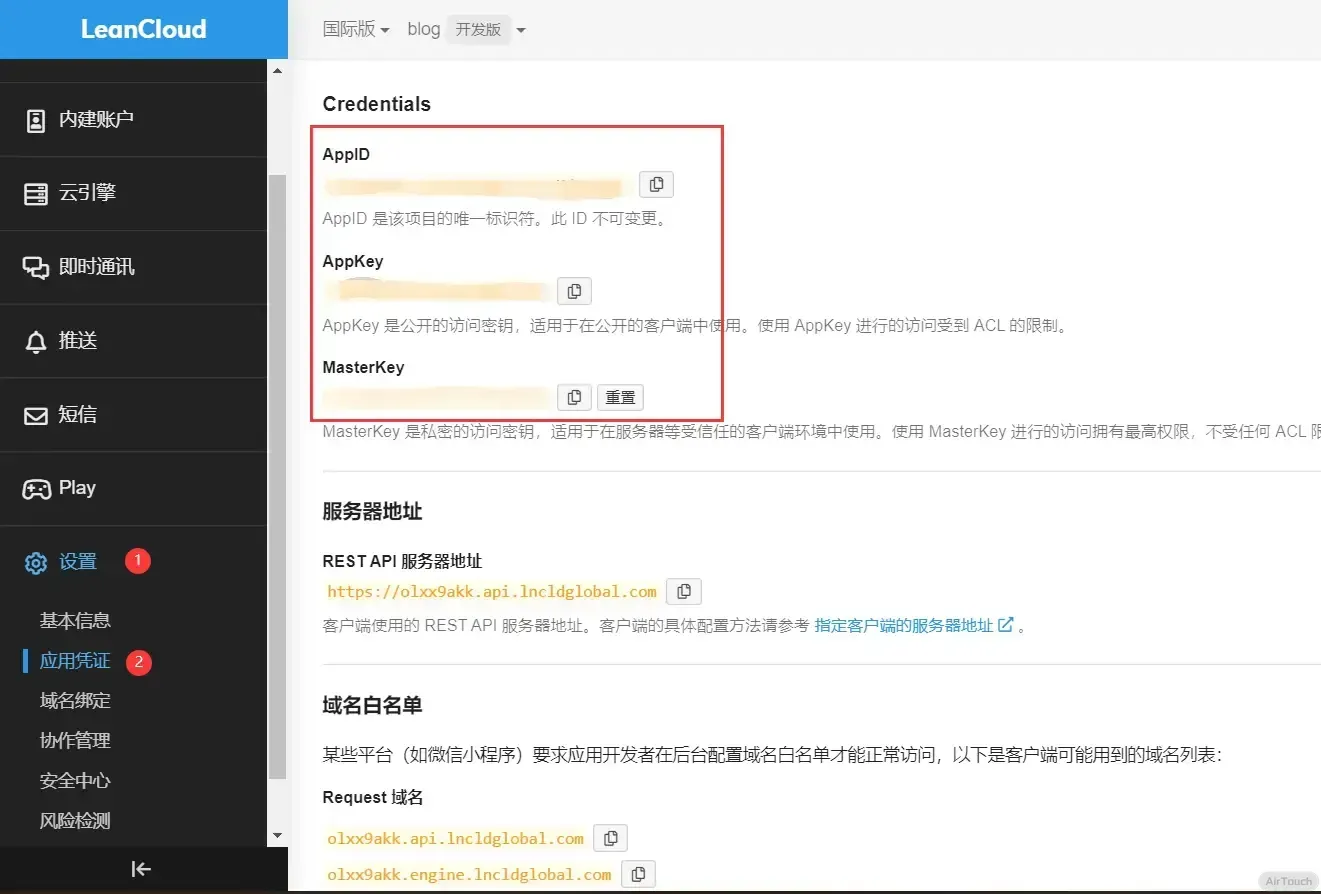
Vercel 部署
- 点击上方按钮,跳转至 Vercel 进行 Server 端部署。
如果你未登录的话,Vercel 会让你注册或登录,请使用 GitHub 账户进行快捷登录。
- 输入一个你喜欢的 Vercel 项目名称并点击
Create继续: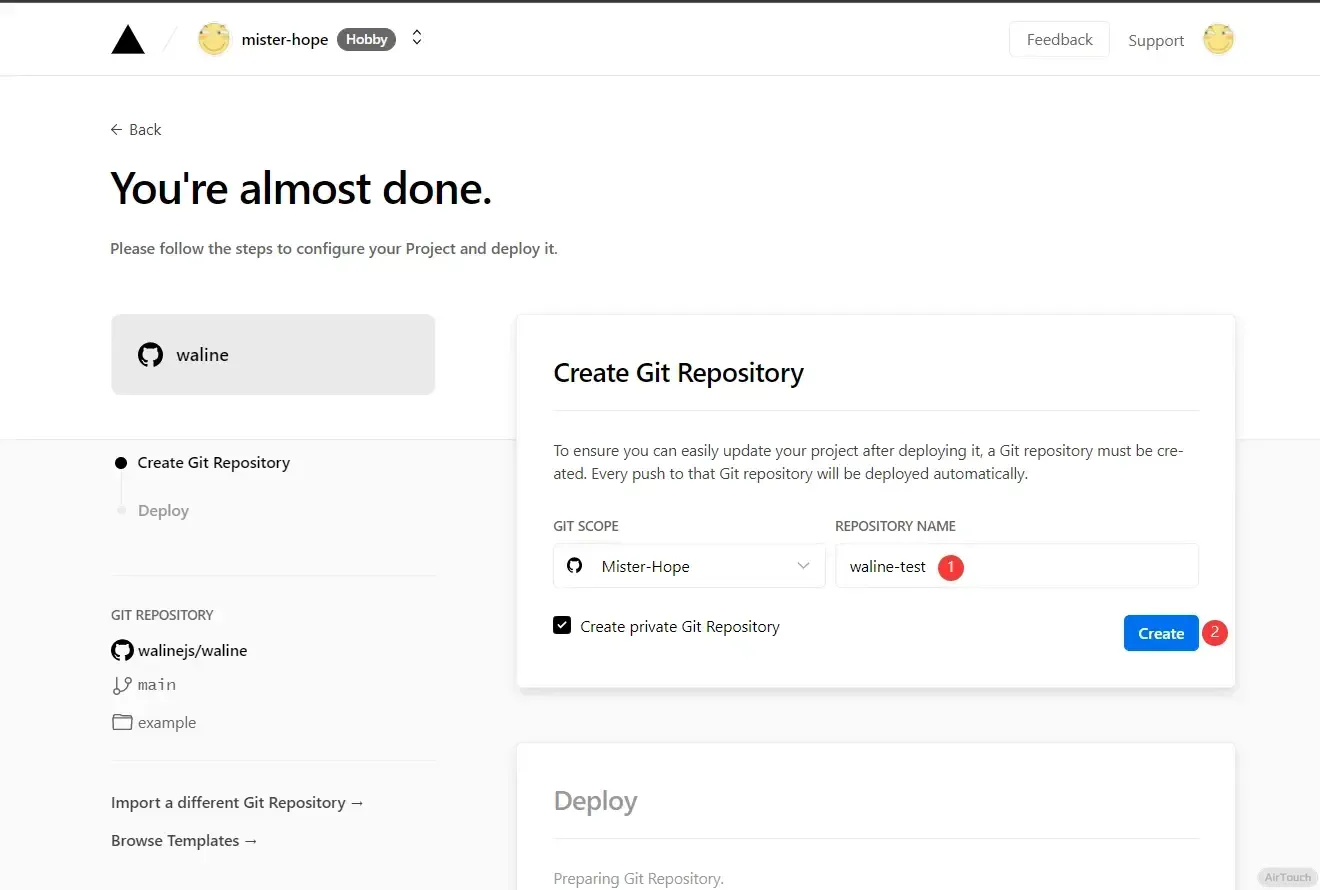
- 此时 Vercel 会基于 Waline 模板帮助你新建并初始化仓库,仓库名为你之前输入的项目名。
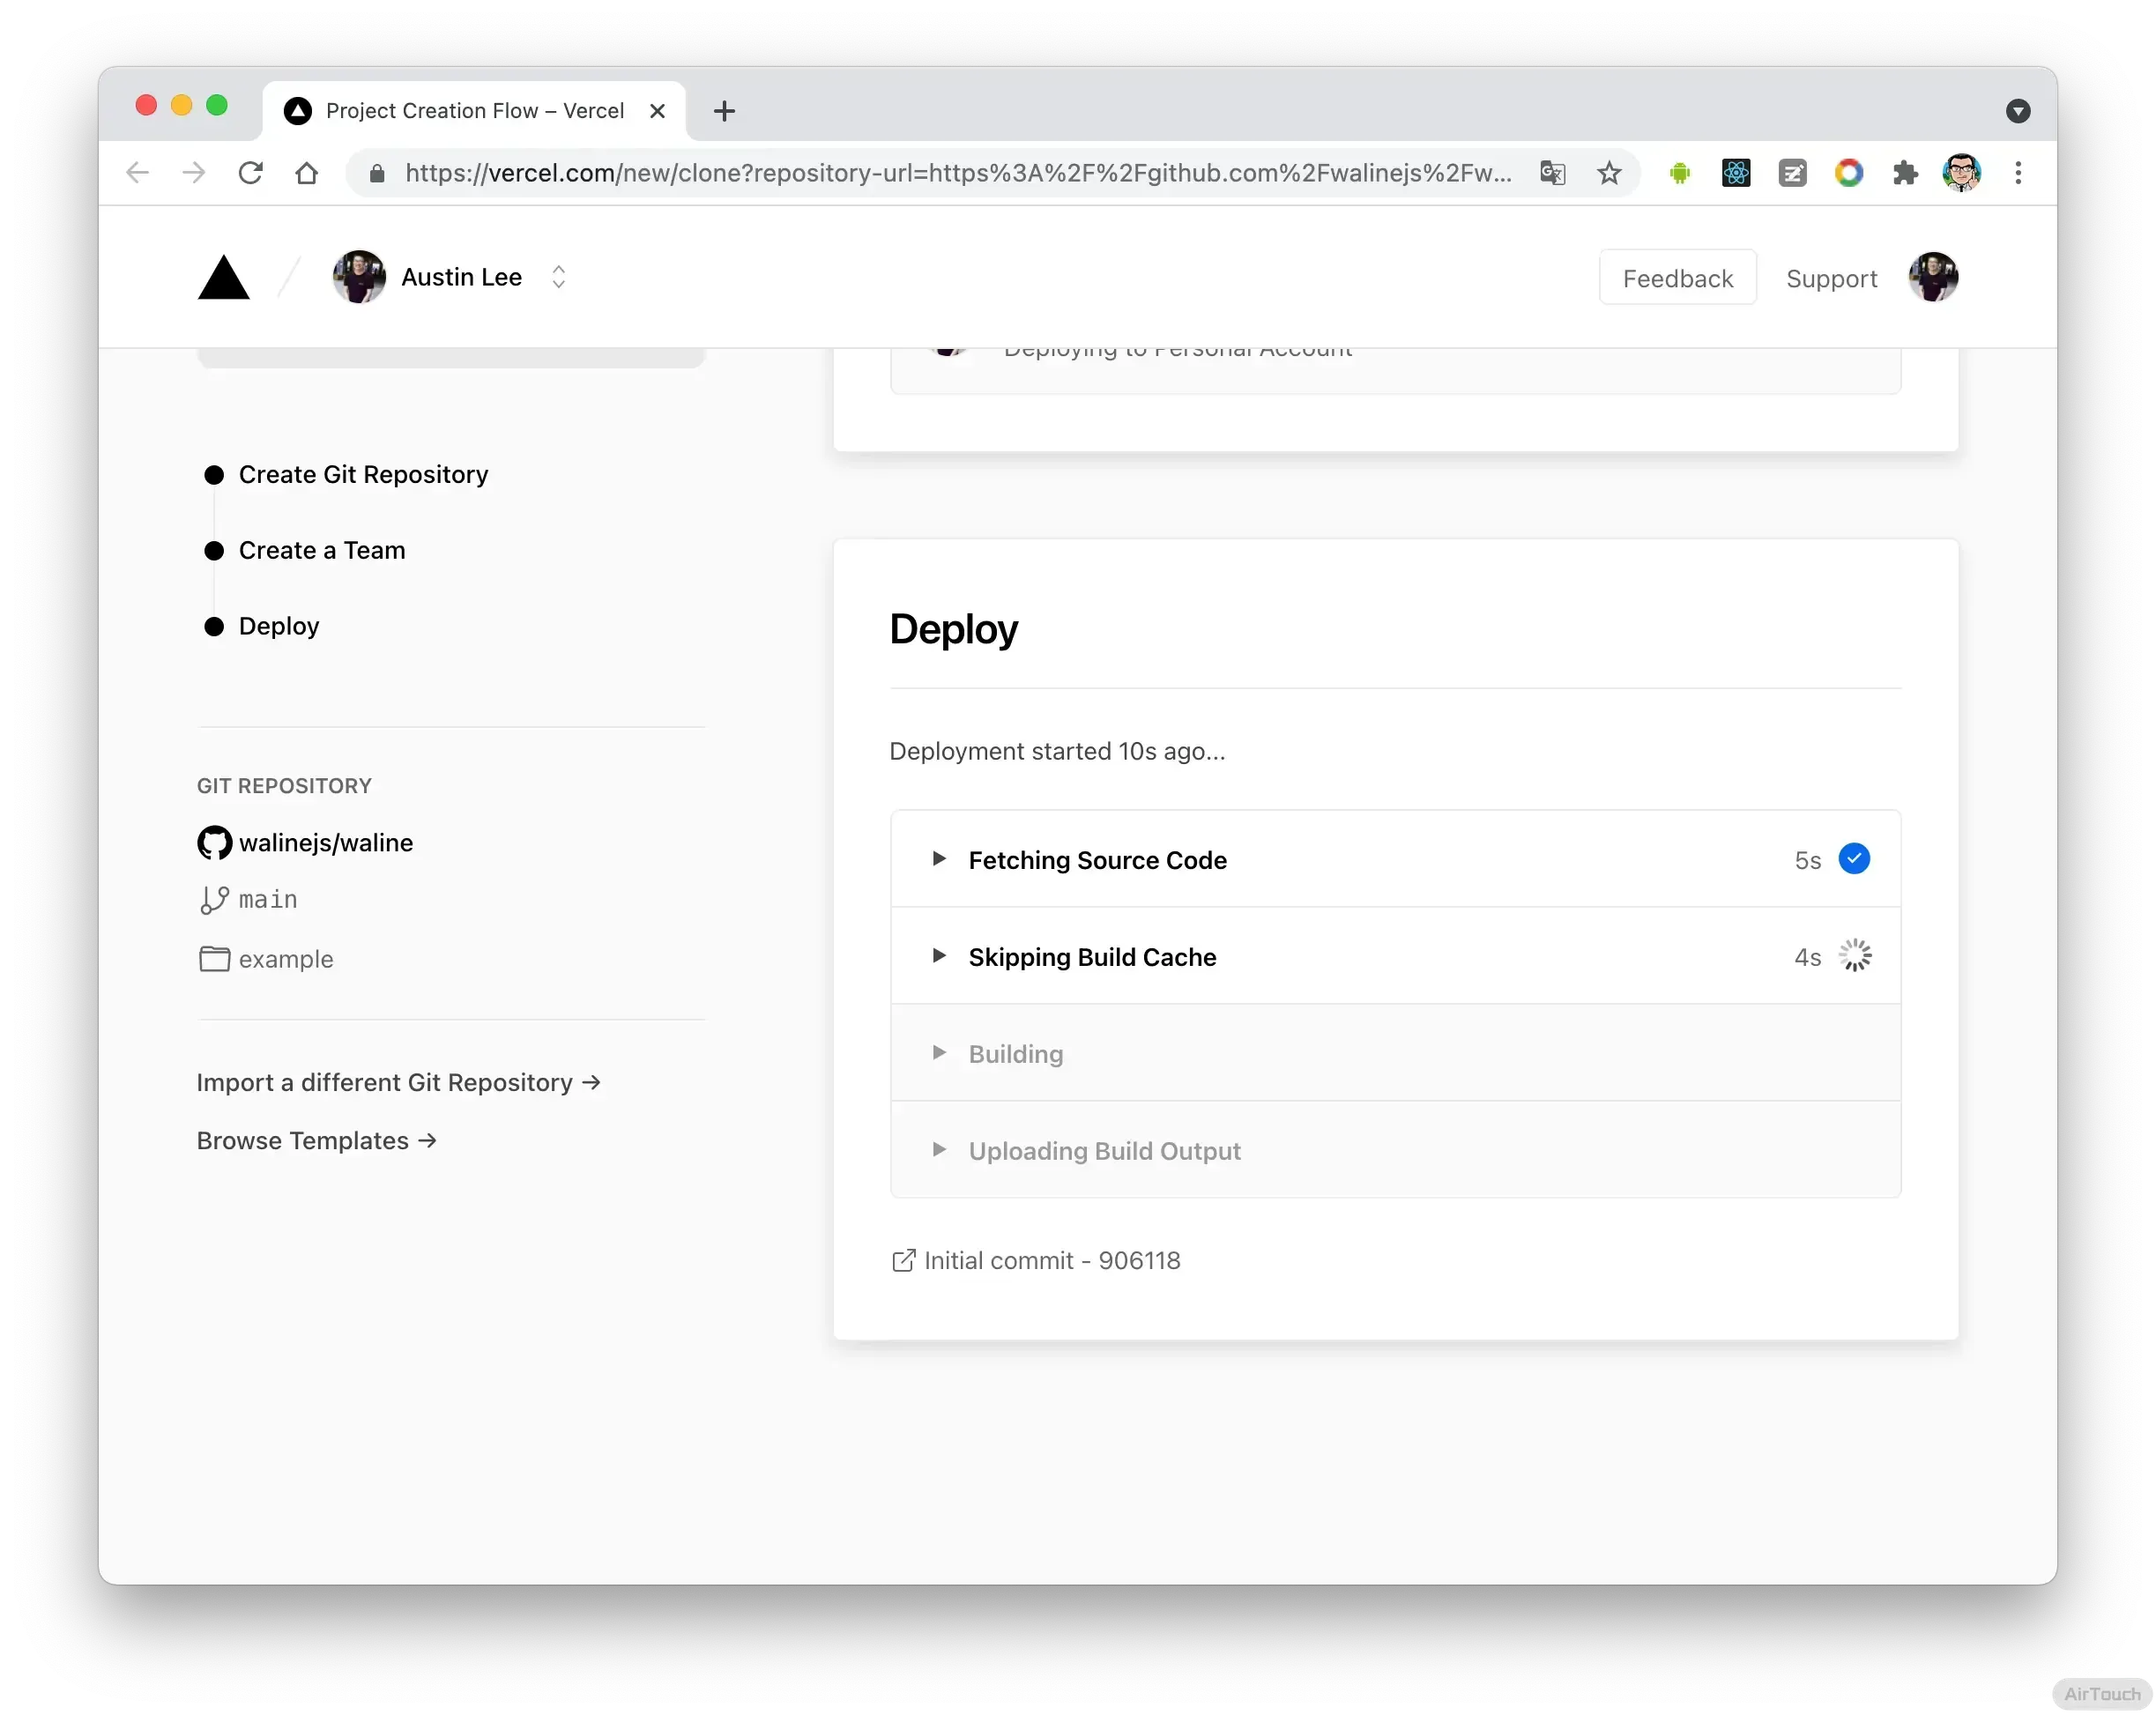
- 一两分钟后,满屏的烟花会庆祝你部署成功。此时点击
Go to Dashboard可以跳转到应用的控制台。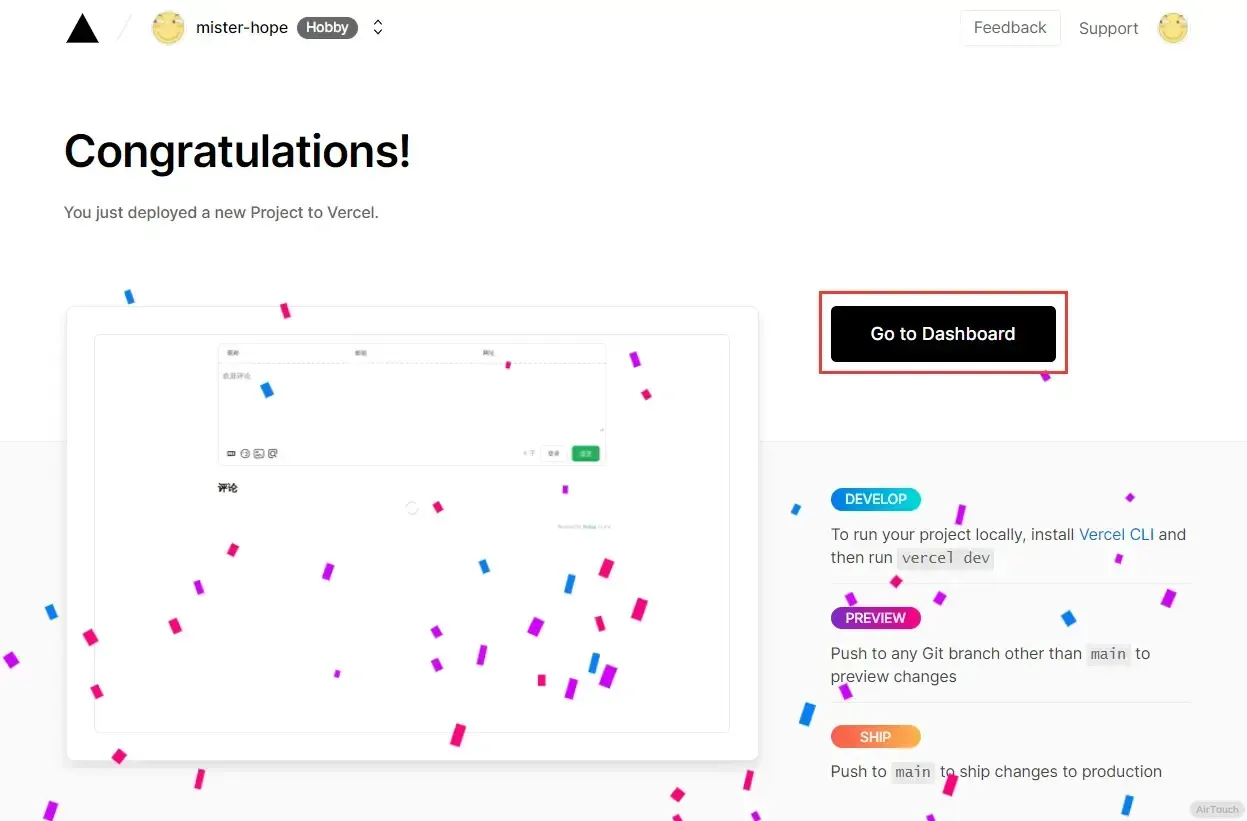
- 点击顶部的
Settings-Environment Variables进入环境变量配置页,并配置三个环境变量LEAN_ID,LEAN_KEY和LEAN_MASTER_KEY。它们的值分别对应上一步在 LeanCloud 中获得的APP ID,APP KEY,Master Key。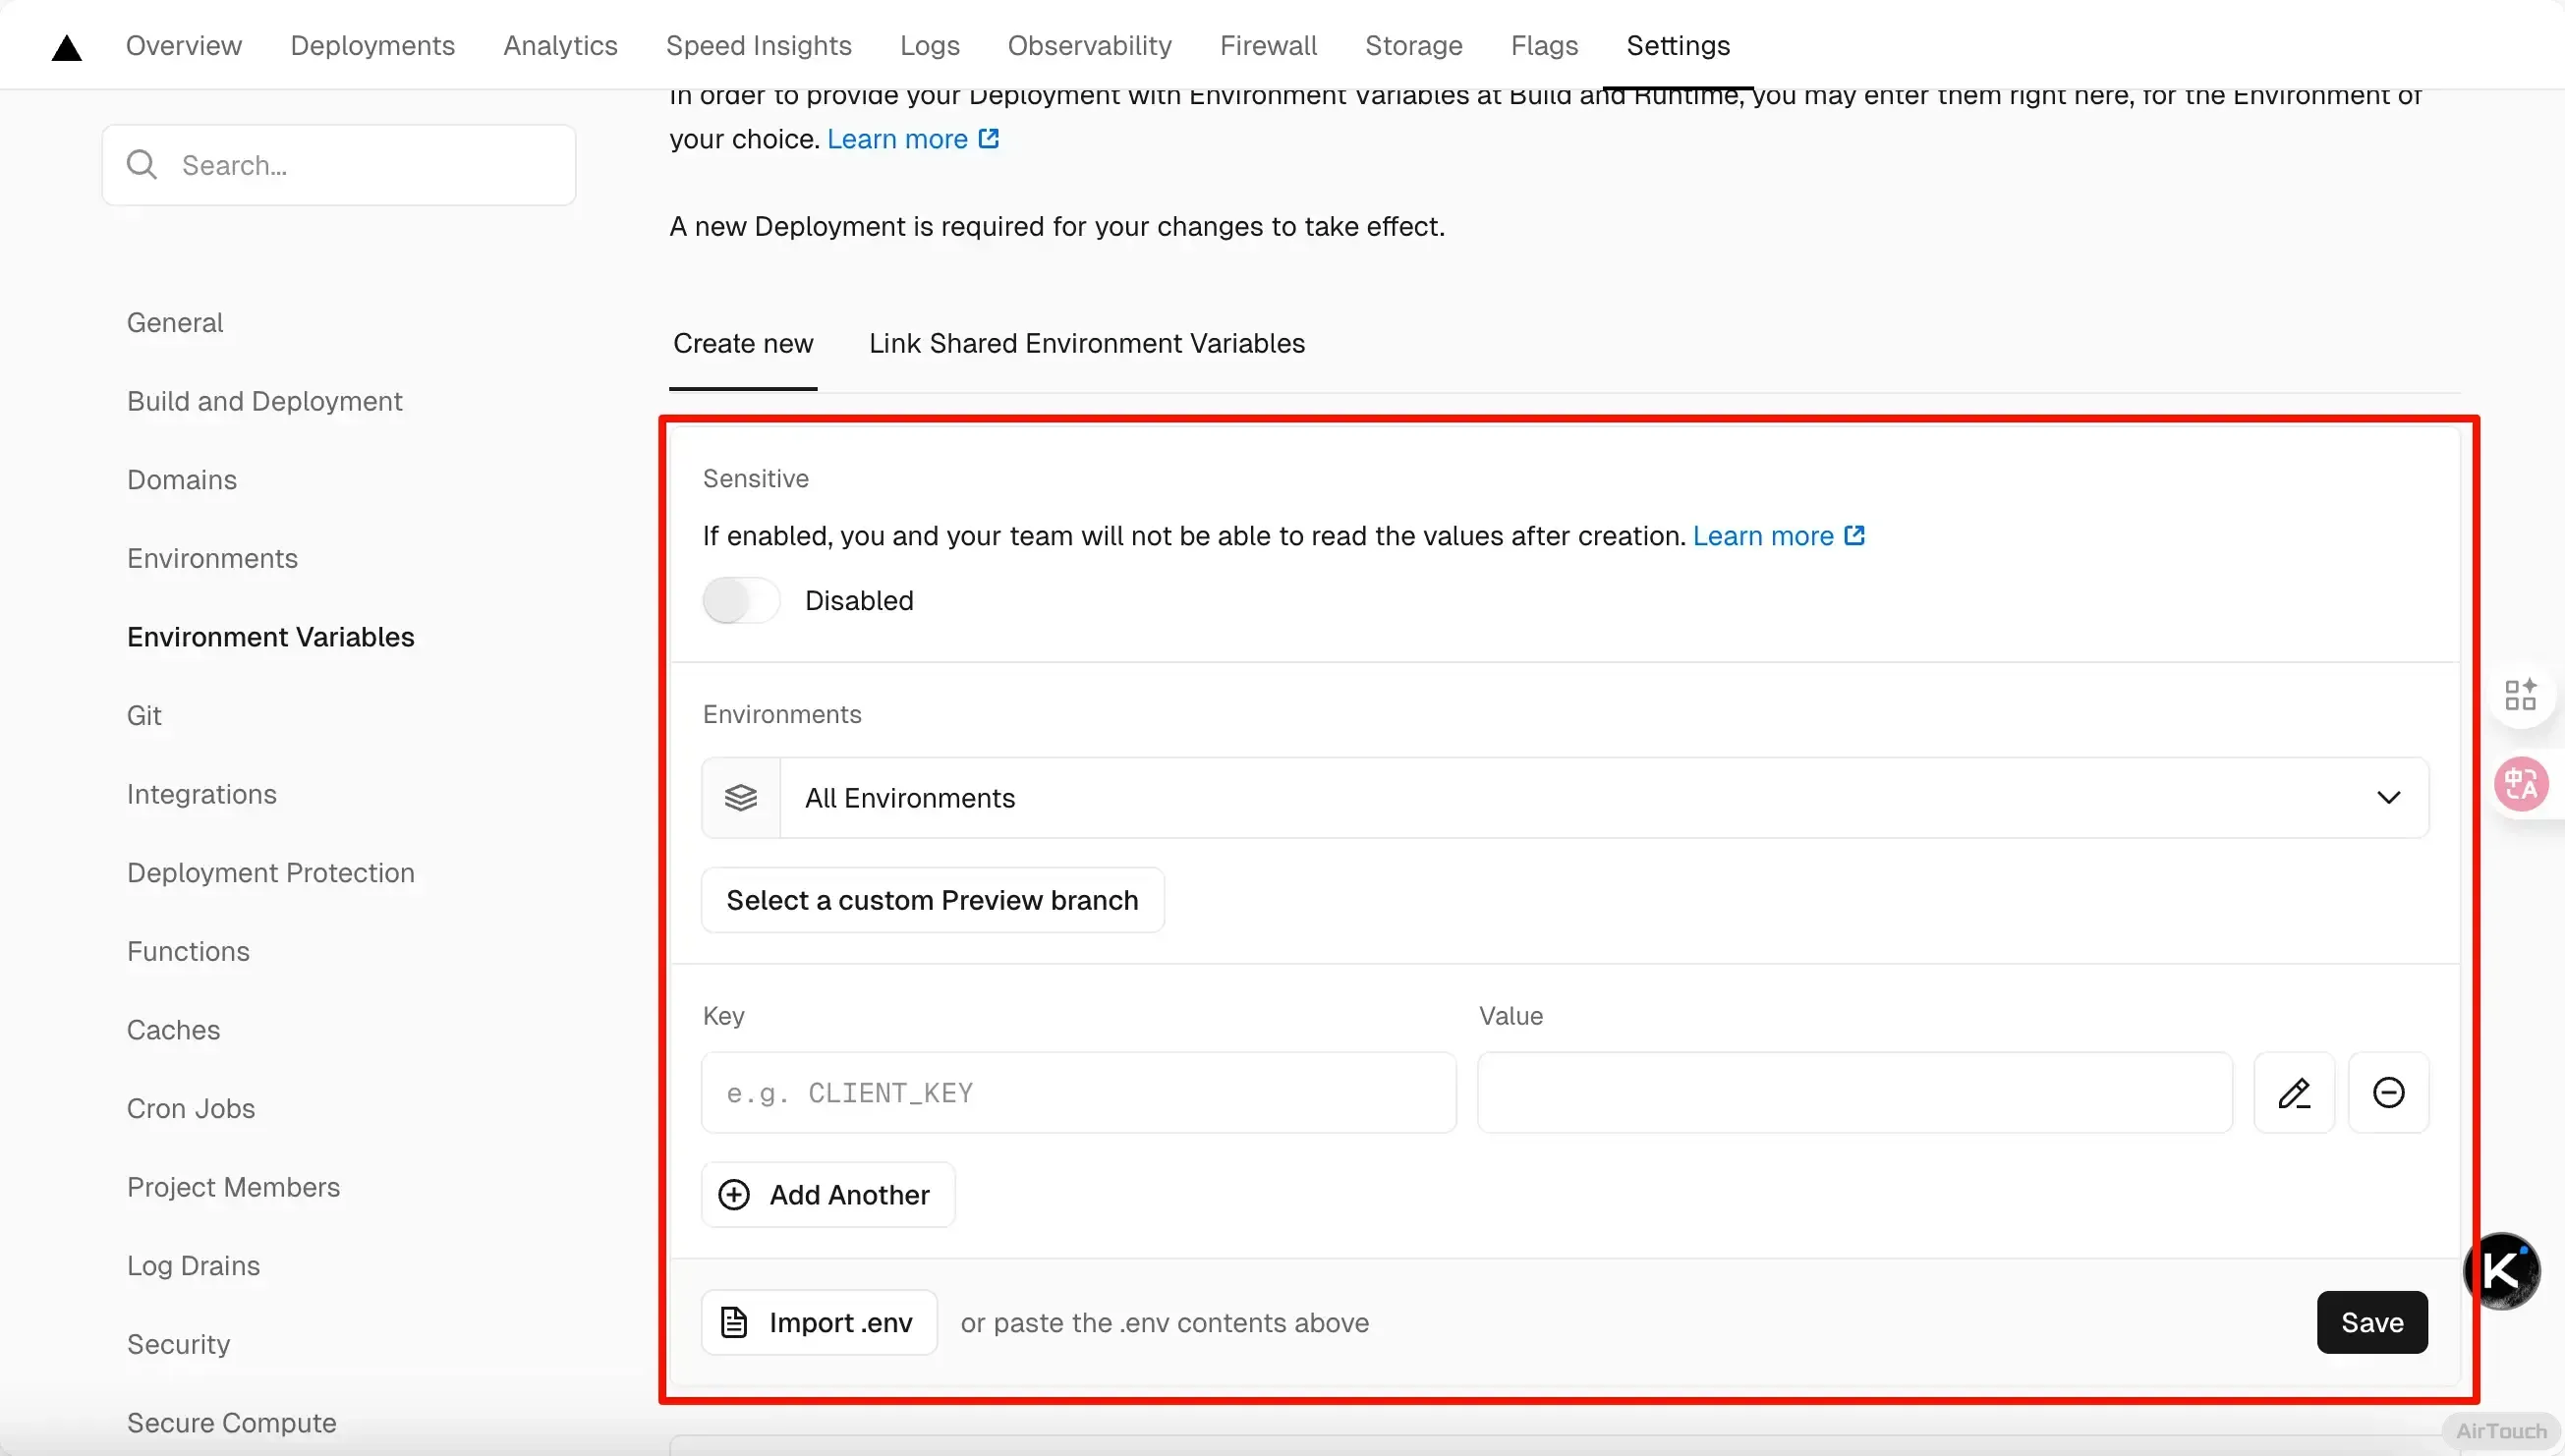
- 环境变量配置完成之后点击顶部的
Deployments点击顶部最新的一次部署右侧的Redeploy按钮进行重新部署。该步骤是为了让刚才设置的环境变量生效。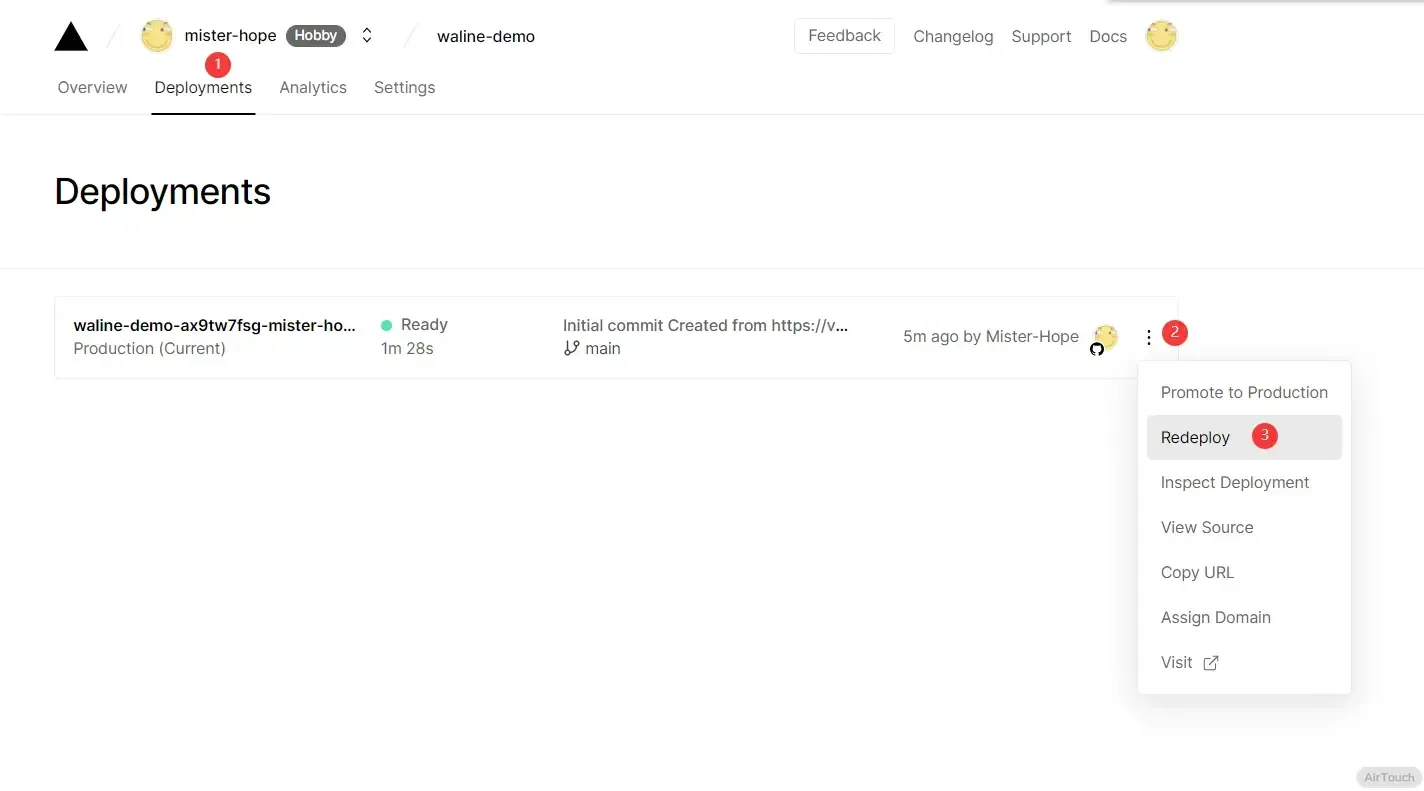
- 此时会跳转到
Overview界面开始部署,等待片刻后STATUS会变成Ready。此时请点击Visit,即可跳转到部署好的网站地址,此地址即为你的服务端地址。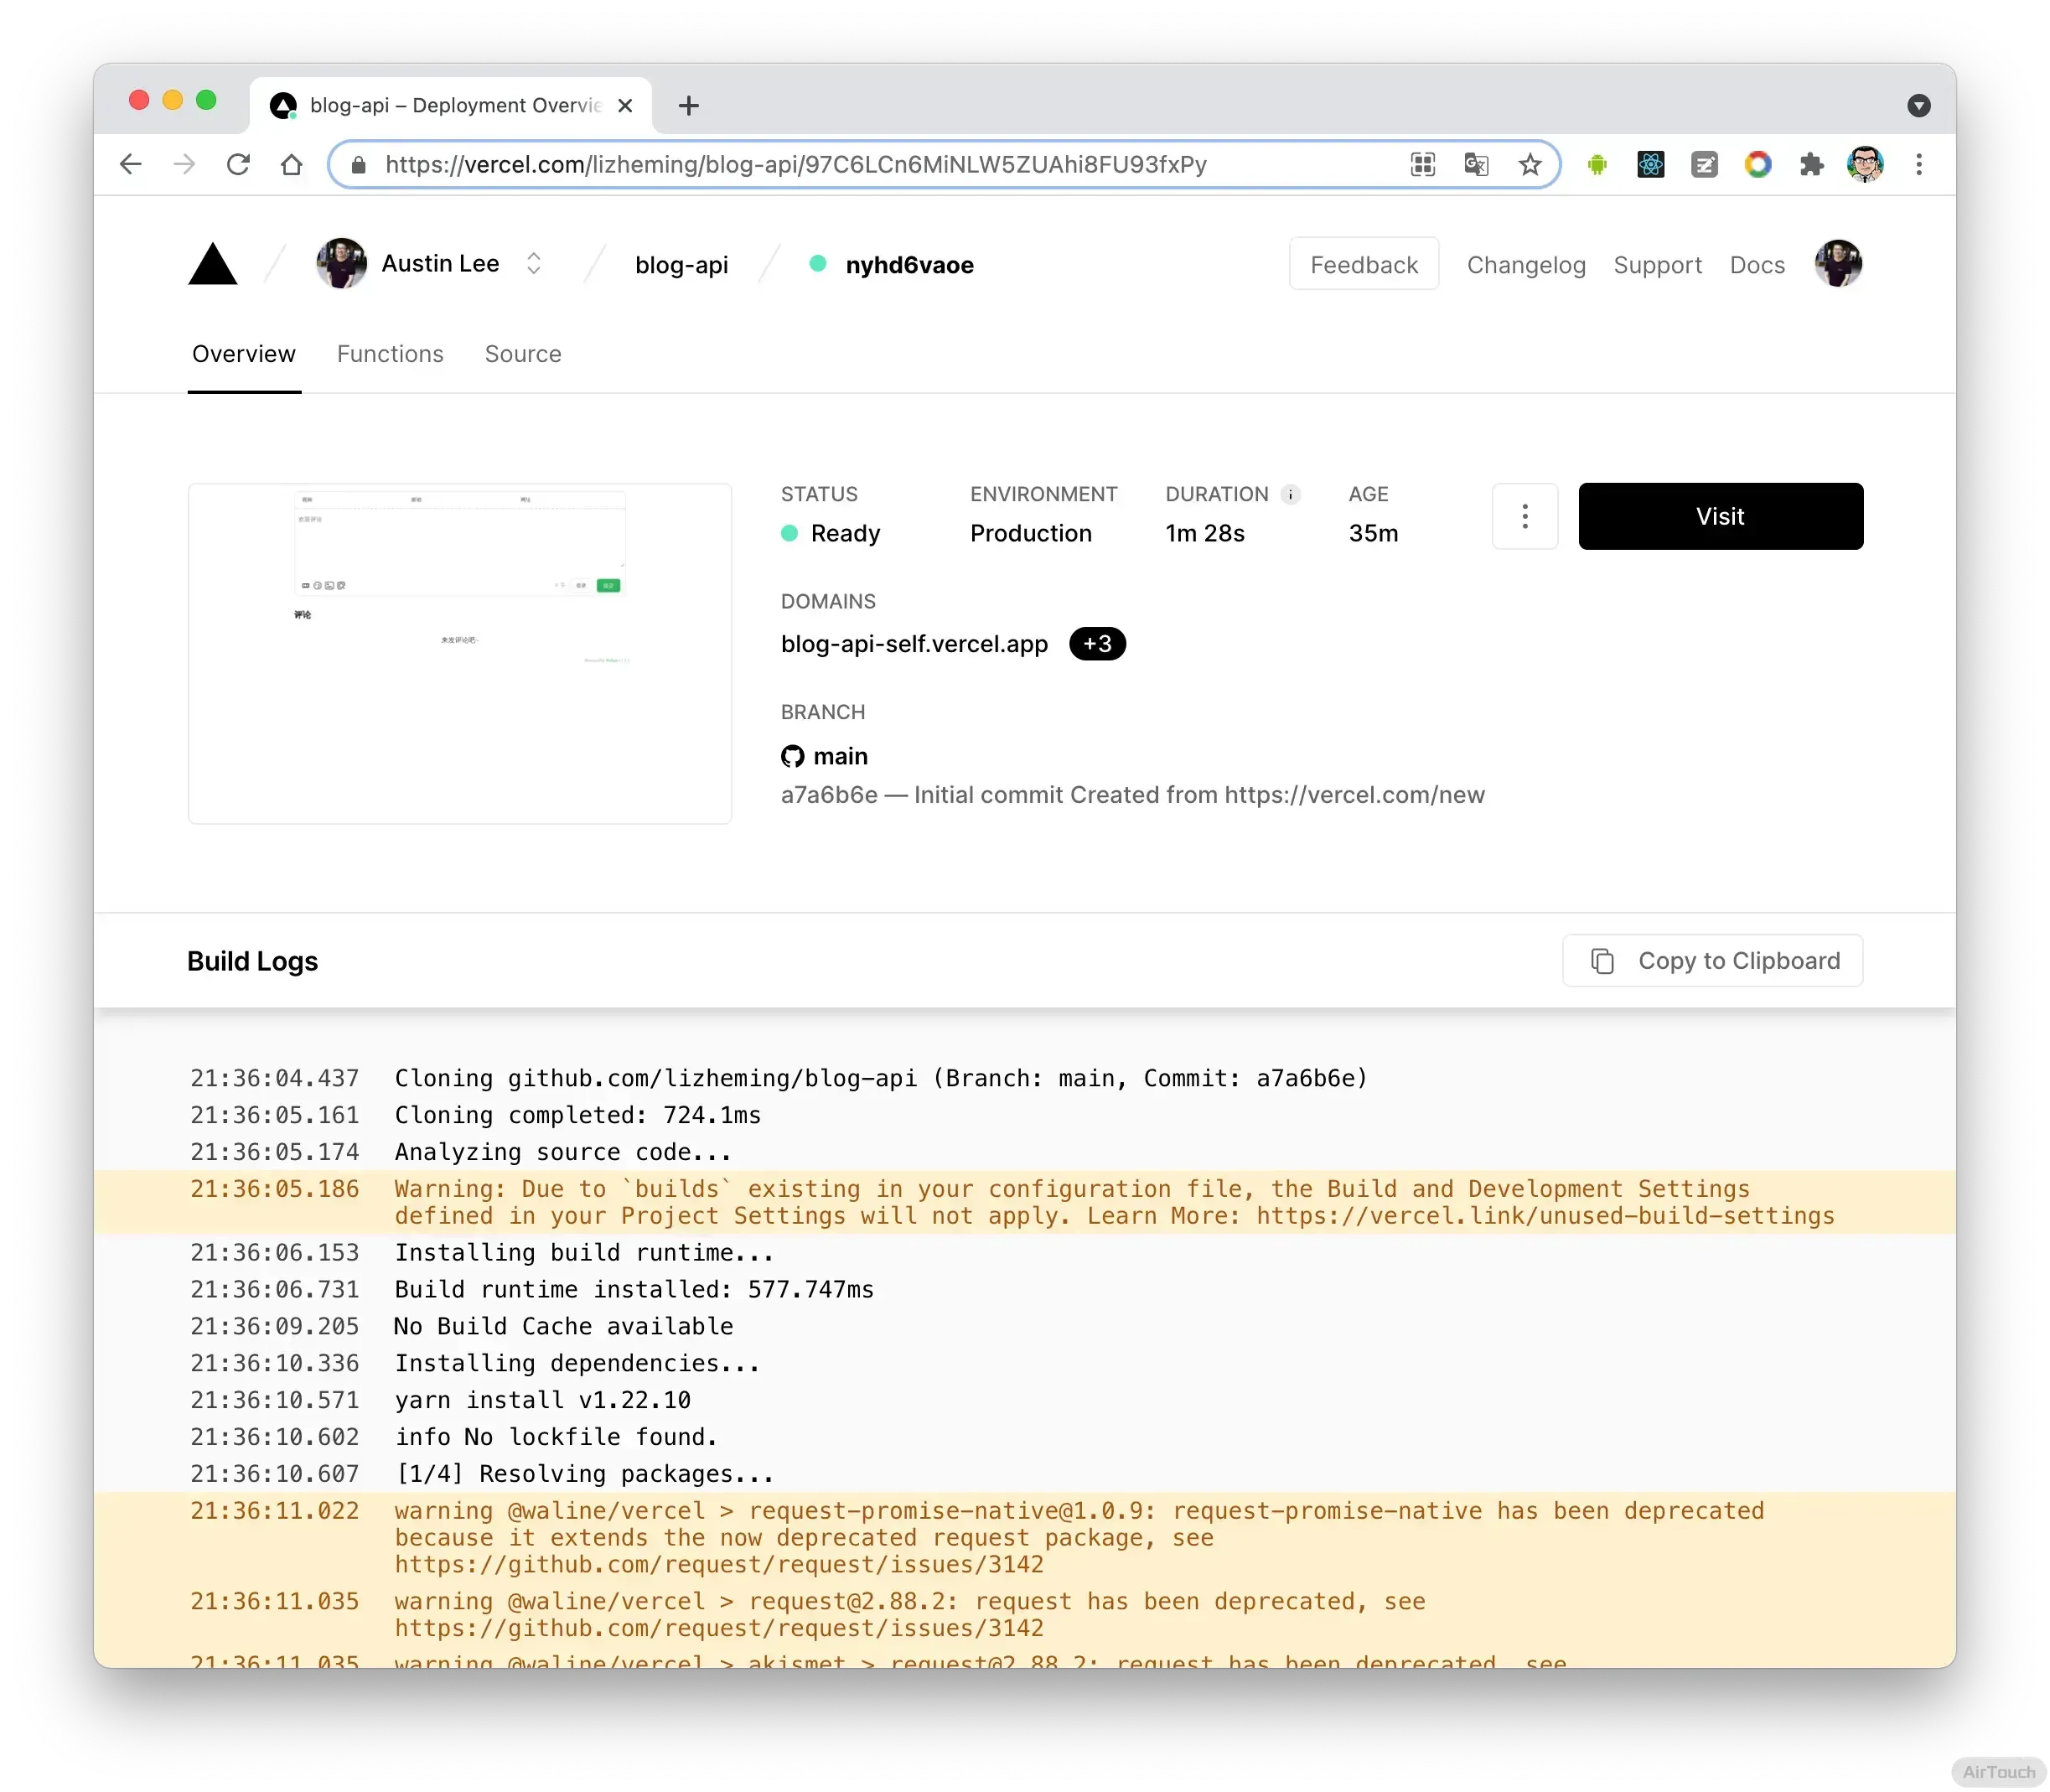
绑定域名 (可选)
- 点击顶部的
Settings-Domains进入域名配置页 - 输入需要绑定的域名并点击
Add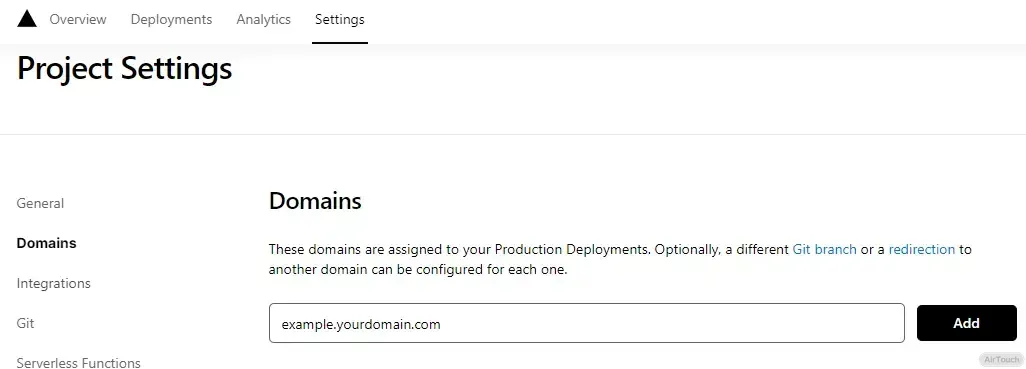
- 在域名服务器商处添加新的
CNAME解析记录 - 等待生效,你可以通过自己的域名来访问了🎉
- 评论系统:example.yourdomain.com
- 评论管理:example.yourdomain.com/ui

配置 stellar
打开 _config.stellar.yml 文件,找到 comments 选项,将 service 设置为 waline。
将 serverURL:改为你的waline 地址(是xxx.vercel.app 或者你绑定的域名)
comments:
  service: waline
  waline:
    js: https://unpkg.com/@waline/client@v2/dist/waline.js
    css: https://unpkg.com/@waline/client@v2/dist/waline.css
    # Waline server address url, you should set this to your own link
    serverURL: https://xxx # waline 地址
    # If false, comment count will only be displayed in post page, not in home page
    commentCount: true
    # Pageviews count, Note: You should not enable both `waline.pageview` and `leancloud_visitors`.
    pageview: false

    # Custom locales
    locale:
      placeholder: # 输入框内提示文字

    # Custom emoji
    emoji:
      - https://gcore.jsdelivr.net/gh/norevi/waline-blobcatemojis@1.0/blobs
    #   - https://unpkg.com/@waline/emojis@1.1.0/weibo
    #   - https://unpkg.com/@waline/emojis@1.1.0/alus
    #   - https://unpkg.com/@waline/emojis@1.1.0/bilibili
    #   - https://unpkg.com/@waline/emojis@1.1.0/qq
    #   - https://unpkg.com/@waline/emojis@1.1.0/tieba
    #   - https://unpkg.com/@waline/emojis@1.1.0/tw-emoji
    #   - https://unpkg.com/@waline/emojis@1.1.0/bmoji
使用 fontawesome 动态图标

因为 Stellar 不再内置 fontawesome 图标库,所以我们需要手动添加。_config.yml 文件中,最后一行加入以下指令:
inject:
  head:
    - <link rel="stylesheet" href="https://cdnjs.cloudflare.com/ajax/libs/font-awesome/6.4.2/css/all.min.css">
就可以愉快的使用 fontawesome 动态图标了。比如配置 footer 栏的图标,_config.stellar.yml 文件下,找到 footer
文章前显示字数|阅读时长|标签

- 在 themes\stellar\layout\_partial\main\navbar\article_banner.ejs 中的 // 3.left.bottom 处,新增代码:
// 3.left.bottom
el += partial('dateinfo')
//新增:字数显示|阅读时长显示
el += '<div class="flex-row" id="page-words"><span style="padding: 4px;">本文:' + wordcount(page.content) + '字</span><span class="sep updated" style="padding: 4px;"></span><span class="text updated" style="padding: 4px;">阅读时长:' + min2read(page.content) + '分</span></div>';
//新增:标签显示
if (page.layout == "post" && page.tags && page.tags.length > 0) {
el += '<div class="flex-row" id="tag">'; // 将标签容器的创建移动到条件内部
el += ' <span> 标签:</span>';
el += list_categories(page.tags, {
class: "cap breadcrumb",
show_count: false,
separator: ' ',
style: "none"
});
el += ' </div>';
}
- 在 themes\stellar\source\css\_custom.styl 文件最后添加:
/* 文章内字数统计&阅读时长 */
.bread-nav div#page-words span.sep:before {
  content: '|';
}
.bread-nav div#page-words span.updated {
  visibility: hidden;
}
.bread-nav:hover div#page-words span.updated {
  visibility: visible;
}
页面底部字数统计
- 安装 hexo-wordcount 插件
bash npm i hexo-wordcount –save
- 打开 themes/stellar/layout/_partial/main/footer.ejs 文件,找到 //footer
js // footer el += '<div class="text">' if (content) { el += markdown(content) } el += '</div></footer>' return el - 在
el += </div></footer>前面加上:js el += '<span class="totalcount">共发表 ' + site.posts.length + ' 篇Blog · </span><span class="post-count">总计 ' + totalcount(site) + ' 字</span>'
- 在 themes\stellar\source\css\_custom.styl 文件最后添加:
css /* 页面底部字数统计 */ .post-count { scrollbar-width: none; color: var(--text-p2); } .totalcount { color: var(--text-p2); } .page-footer { text-align: center; margin: 0 auto; width: 100%; }
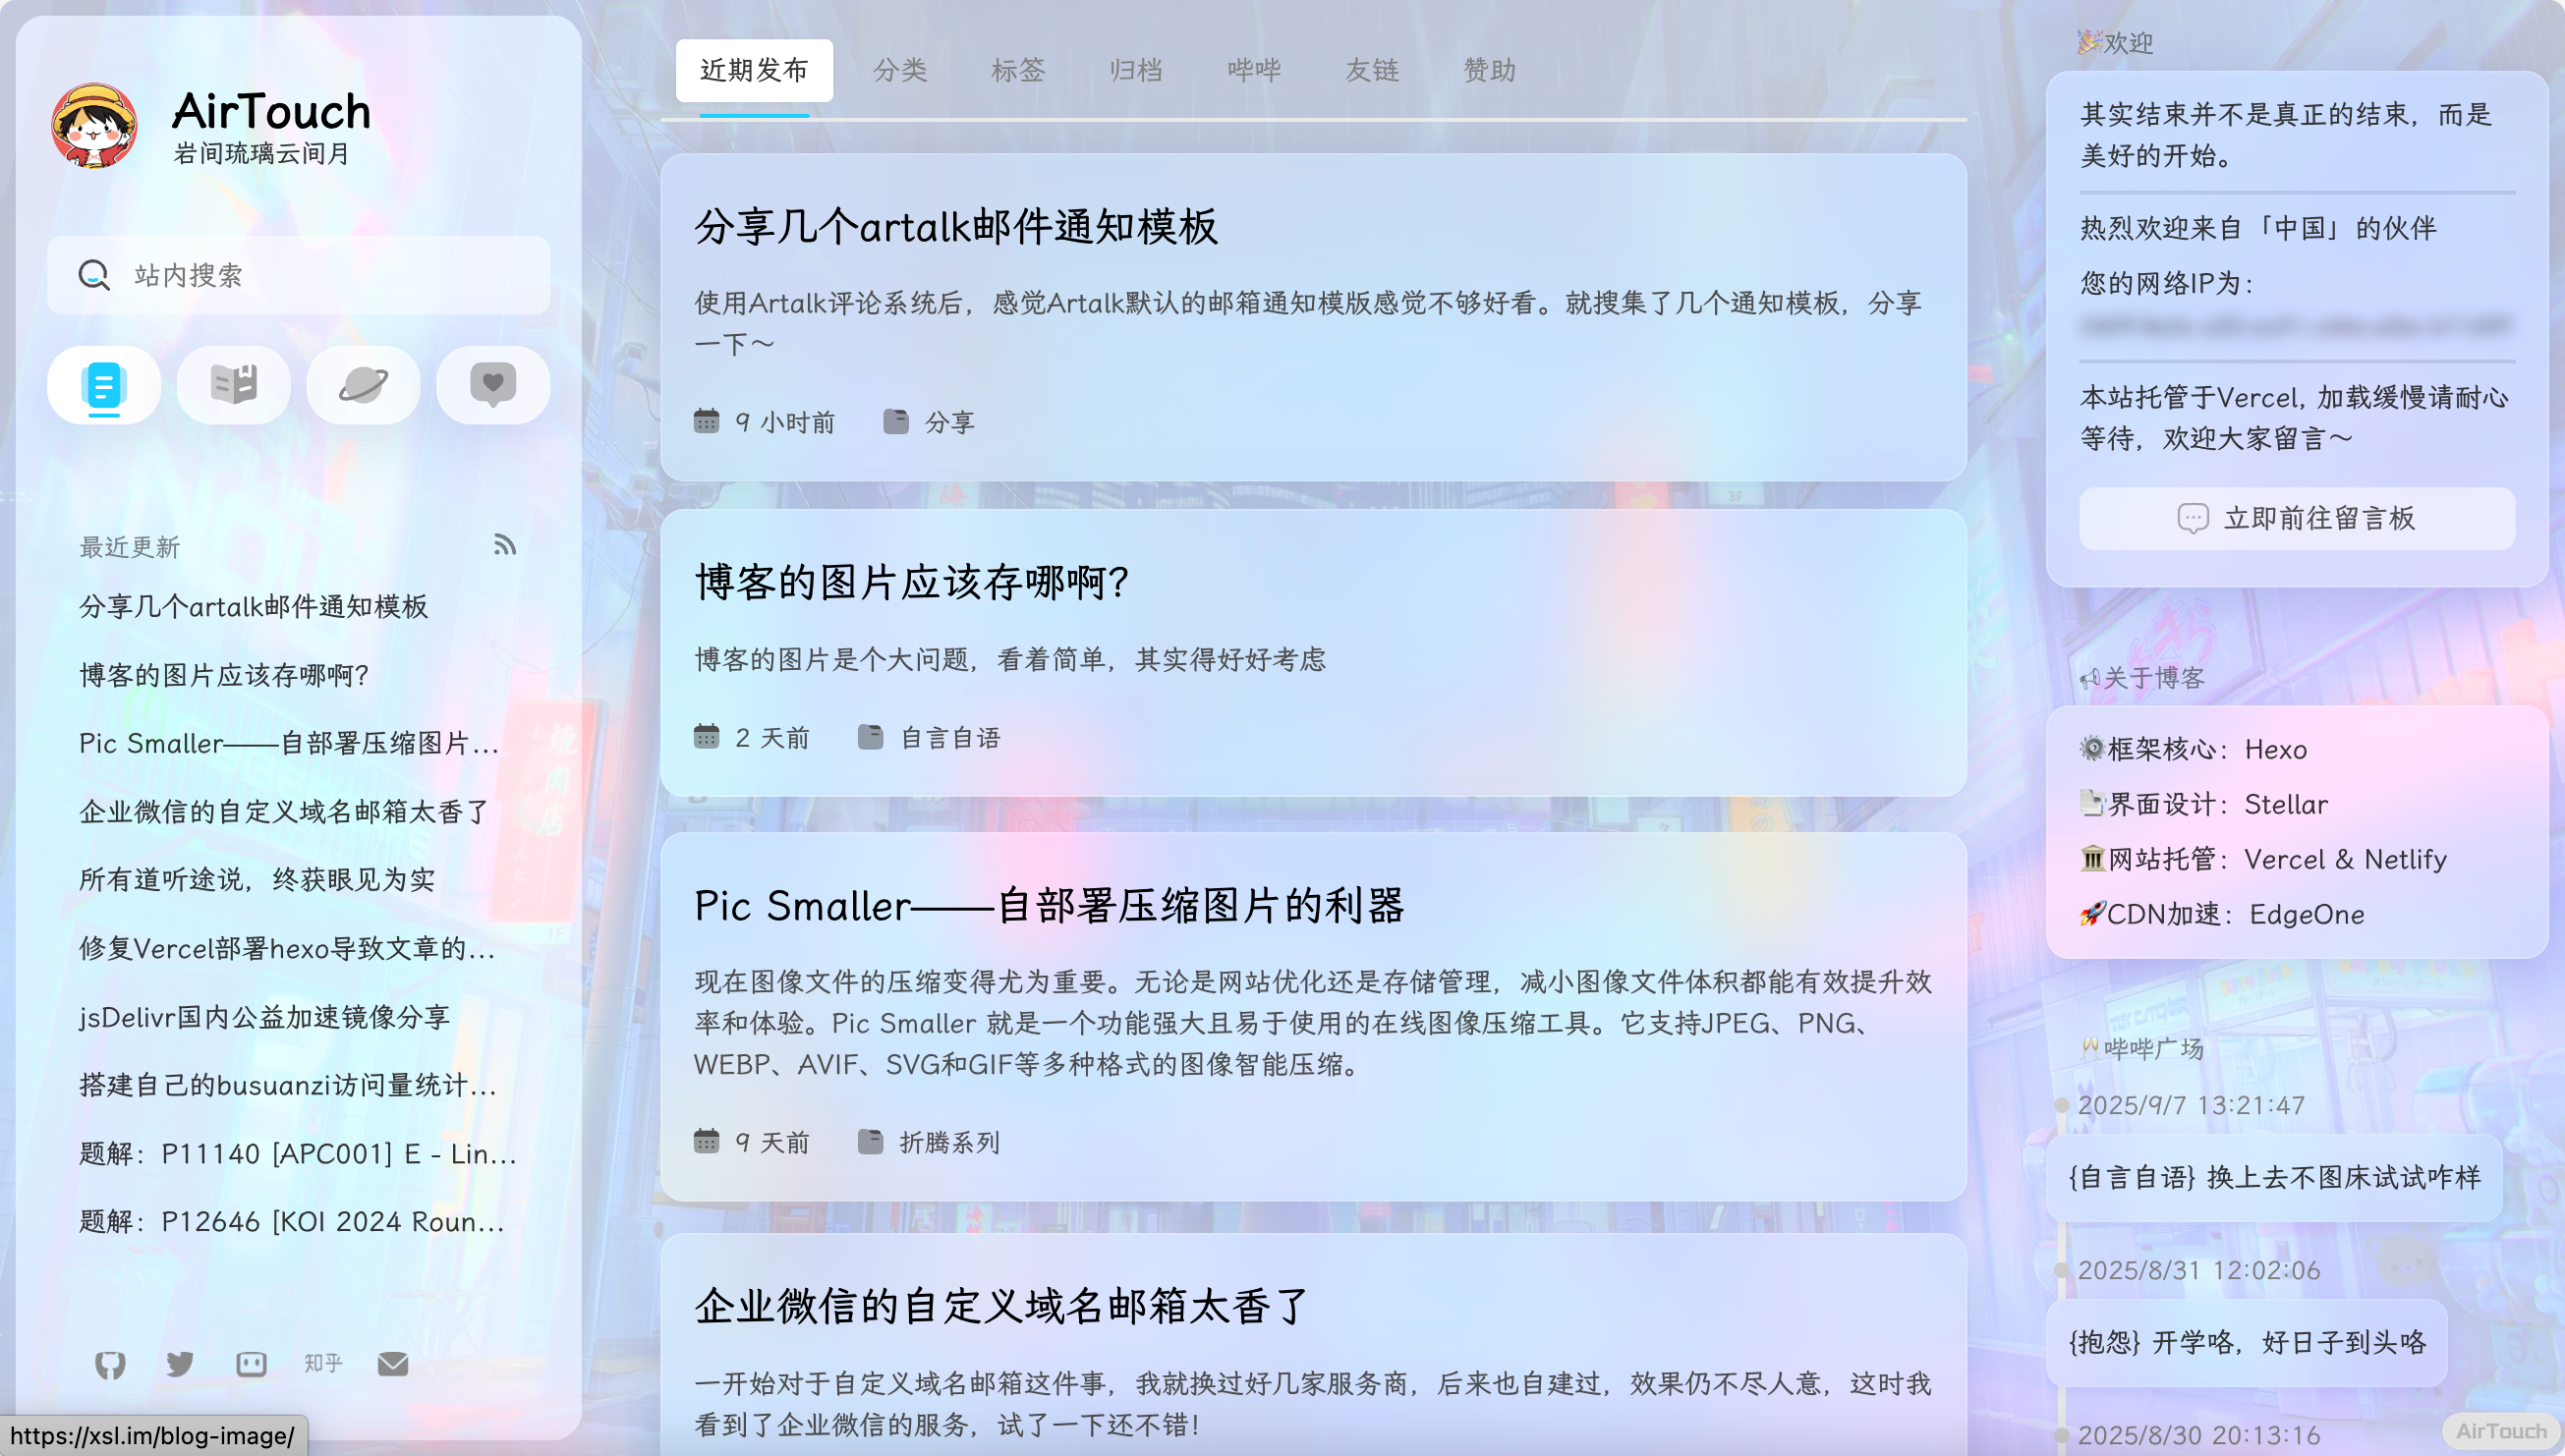
侧边栏欢迎语

- 在 themes\stellar\_data\widgets.yml 文件中新增一项侧边栏配置,写下你的网站欢迎语。
# 欢迎语
welcome:
  layout: markdown
  title: 🎉欢迎
  content: |
    本站托管于Vercel, 加载缓慢请耐心等待,欢迎大家畅所欲言。
    <hr style="border: 1px solid black; background-color: black;">
    <span id="jinrishici-sentence"></span>
    <script src="https://sdk.jinrishici.com/v2/browser/jinrishici.js" charset="utf-8"></script>
- 修改主题配置 _config.stellar.yml,设置欢迎语出现的具体位置
# 站点主结构树
site_tree:
  # -- 列表类页面 -- #
  # 主页配置
  home:
    leftbar: recent
    rightbar: welcome
memos 说说功能
{% timeline api:https://s.dusays.com/api/v1/memo?creatorId=188&limit=5 type:memos avatar:https://img.airtouch.top/be3cf7bd9eb2a55b1db05d7a0a405cd6.webp %} {% endtimeline %}
想要实现 memos 功能,首先需要注册一个账号。注册账号可以使用别人已经搭建好的 memos,也可以自行搭建 memos(需要有服务器,我就不折腾了)。这里直接采用的杜老师的 memos。
- 查看教程,注册一个自己的账号
- 注册好后,在教程下面评论让杜老师帮忙查看自己的 ID
- 在博客 source 文件夹下,新建 bb 文件夹,在文件夹里新建 index.md,把下面的粘贴进去
md {% timeline api:https://s.dusays.com/api/v1/memo?creatorId={你的ID}&limit=10 type:memos avatar:{你的头像} %} {% endtimeline %} - 如果需要在博客侧边栏 sidebar 中展示 memos,首先在 themes\stellar\_data\widgets.yml 中新增一条记录
yml # 哔哔 memos-du: layout: timeline title: 🥂哔哔广场 api: https://s.dusays.com/api/v1/memo?creatorId={你的ID} type: memos hide: user,footer - 然后在 _config.stellar.yml 设置让其生效
yml site_tree: # -- 列表类页面 -- # # 主页配置 home: leftbar: recent rightbar: memos-du
字体设置
- _config.yml 文件中,最后一行加入以下指令
yml inject: head: - <link rel="stylesheet" href="https://cdn.staticfile.org/lxgw-wenkai-screen-webfont/1.6.0/lxgwwenkaiscreen.css"> - _config.stellar.yml 中找到 style.font-family,修改以下内容
yml style: font-family: logo: '"LXGW WenKai Screen", system-ui, ...' body: '"LXGW WenKai Screen", system-ui, ...'
评论加载中...